Welcome to Instafans! You’re just a few steps away from sharing your content and growing your audience. Whether you’re new here or skipped a few optional fields during registration, this guide will walk you through how to set up your Instafans profile, verify your ID, and start earning.
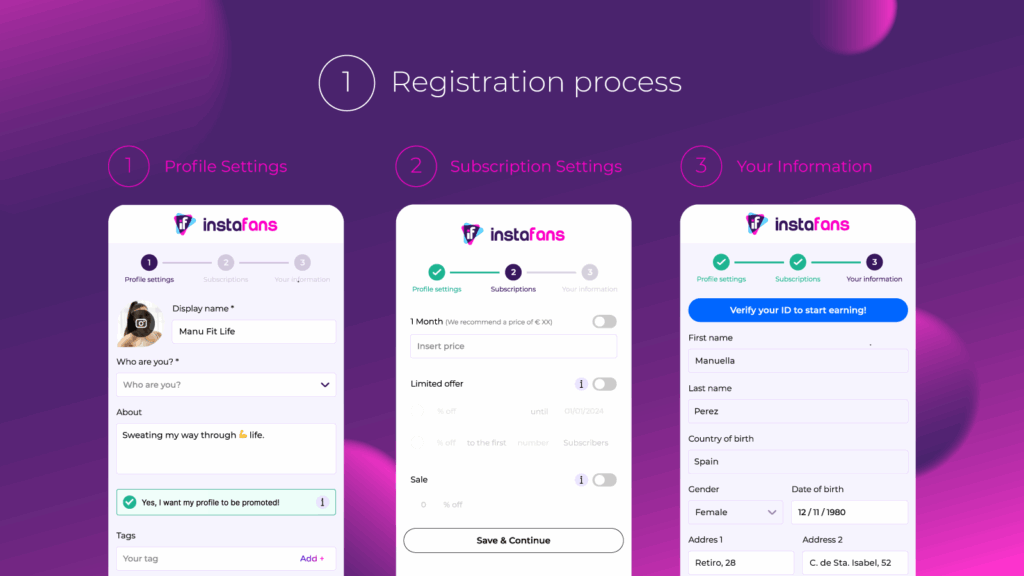
Step 1: Complete the registration process
Once your email is verified, you’ll complete a three-step registration process. Here’s what to expect:
- In the Profile Settings step, you’ll be asked to add a display name, describe who you are, and select at least 3 tags — these are required to proceed. Optionally, you can upload a profile picture, write an “About” section, and choose whether you want your profile to be promoted. If you skip any of the optional fields, you can complete or update them at any time via your profile settings.
- Next, in Subscription Settings, you’ll decide whether your profile will be free or have a monthly subscription price. If you choose to charge, you’ll also have the option to set a limited offer or a sale to attract new subscribers — or you can skip this part and return to it later. Learn more about subscriptions and sales.
- Finally, under Your Information, you’ll be able to verify your ID using our secure KYC process. While you can skip this during registration, it’s required in order to post content or receive payouts. You can complete it any time from Account Settings > Verification.
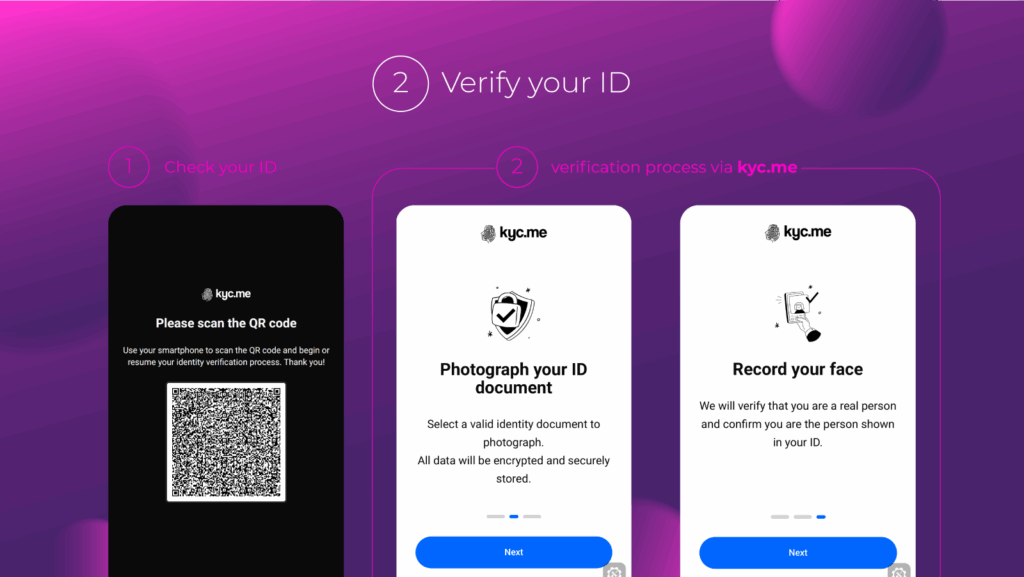
Step 2: Verify your ID (if you skipped it)
To start posting on Instafans, your ID must be verified. The process is quick and secure:
- Go to Account Settings > Verification, then click the “Check your ID” button.
- If you’re using a computer, a new tab will open with a QR code – scan it to start the quick verification process via our trusted partner, kyc.me. If you’re on a mobile device, you’ll be redirected automatically to the verification process.
- You’ll be asked to upload a valid ID and take a quick selfie video. Once completed, you’ll just need to wait for approval, which usually happens quickly. You’ll be notified as soon as your ID is verified and your account is ready.
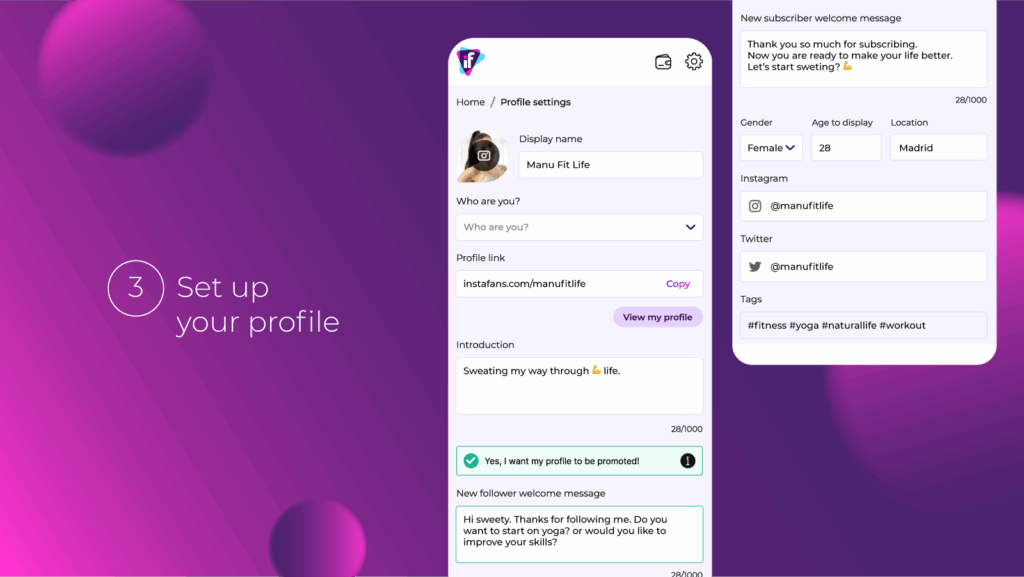
Step 3: Set up your Instafans profile
From your Profile Settings, you can make your profile more appealing by:
- Adding a short introduction
- Setting an automatic welcome message for new followers and subscribers
- Including your social media links
- Updating or uploading your profile picture
- Adding or refining tags to improve discovery
A complete profile builds trust and increases your visibility on the discovery page.
Step 4: Create your first post
Once verified, you’re ready to post:
- Click the “Create New Post +” button from your dashboard
- Upload up to 5 media files
- Add a description and include at least one tag
- Choose the visibility:
- Public – visible to everyone
- Subscribers only – exclusive for your subscribers
- Paid – requires payment to unlock, even for subscribers
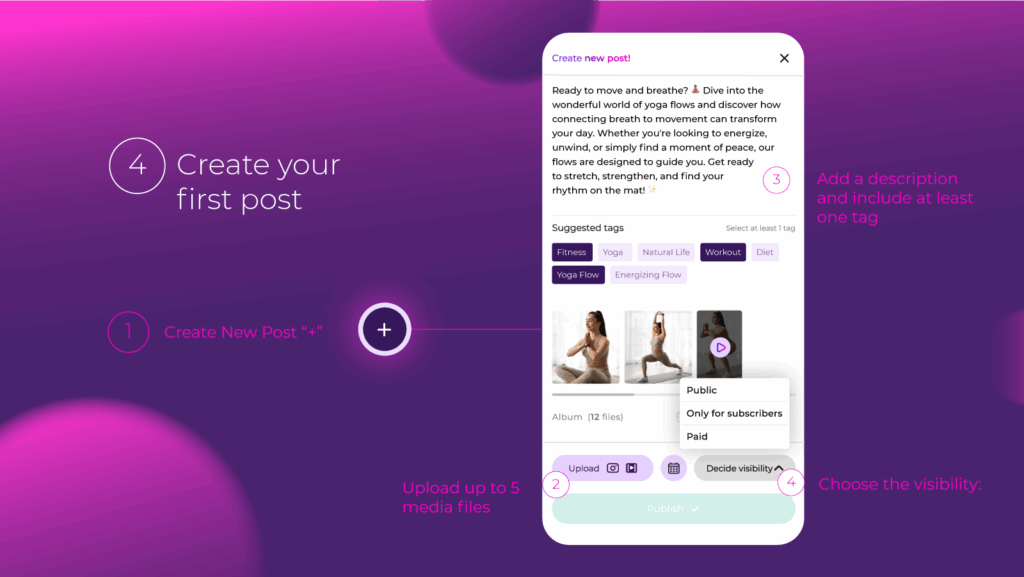
You can publish right away or schedule it for later using the calendar icon. You can learn more about how to schedule and manage your scheduled posts in this article.
That’s it! You’re now ready to post, earn, and grow your presence on Instafans.
Watch our quick tutorial below!